The EdTech Coach Podcast

Showing posts with label apple. Show all posts

Monday, December 31, 2018

Apps for Classroom Backchannels


What is a backchannel? A backchannel is essentially a classroom conversation that takes place alongside a class. With the advent of technology in the classroom, backchannels can now take place digitally, in or out of the classroom.

How can a backchannel be used in the classroom?

Opening up a backchannel in your class can serve numerous purposes. It can allow quieter students to fully participate in class. By setting up a digital backchannel using one of the below apps, quieter students can simply log in and share their question or comment. It can supplement your teaching by allowing for discussions outside of the classroom. Students and teachers can participate in a supplemental dialogue about the subject after class is over.

Apps that can be used for a class digital backchannel include:

Backchannel Chat: An app and a website, Backchannel Chat gives the teacher control about what is discussed in the backchannel. Discussions can be archived and available for future reference. Another great aspect of this app is that every post in the backchannel can be moderated by the teacher and must be approved before posted for all to see. Along with the website, there’s an app for Android and iOS.

Padlet: Create a wall that pertains to a specific topic or chapter and use it as a backchannel. Allow students to comment and ask questions on the board. Make sure and turn on the profanity filter.

PollEverywhere: In the same way you opened a Padlet wall, start a discussion in PollEverywhere. Use the app or the website to let students communicate with you. Use PollEverywhere while students are working on a project or classwork. Great for students that are timid in the classroom.

Google Slides Q & A: If you use Google Slides to do a presentation, you’ve got to use Google Slides Q&A as a backchannel. Simply go to your audience tools and start a new Q&A. During the presentation, a URL is presented at the top of the presentation, directing students where to go to ask a question or make a comment. Students can vote on which questions or comments are the best then, at the end of the presentation, the teacher can choose to display the comments while they address them.

Verso: Verso is unique in that when you post an activity to discuss, it allows you to post a recording of yourself giving directions, a document from your Google Drive, or attach a link for students to access. Verso provides an option that allows the teacher, to include certain vocabulary. The other thing that’s unique about Verso is that, as the teacher, you can access classroom stats, showing who has participated in your discussions and how often. Verso is available on the web at Verso app.com as well as an app
.
Slack: Slack is not only great for business teams, but it can be used in classrooms as well. Set up channels for different class topics. Use separate channels for comments and questions. As the teacher, send out discussion topics and ask students to comment. Send students feedback on their work in class.

Sunday, December 30, 2018

Podcasting in the Classroom


With more and more students having access to Chromebooks or iPads, there are new ways students can achieve their learning objectives, one of those being podcasting.

Back in the day, podcasting would have required a portable tape recorder and a blank cassette. Students could talk into the microphone on the recorder all the while making sure they pressed play/record on the machine. Each group would have to use their own audio cassette or share one among the class, hoping they didn't record over other groups work.


Today, podcasting has gone digital. It's a great tool to use for formative assessment and collaborative work. Simply pair students up or have them work in larger groups to create a podcast.

Why podcast? Along with serving as a tool for formative assessments, podcasts can address many listening and speaking standards. A few ways to integrate podcasts into the classroom include:

Reflections: Students can reflect on their learning by speaking what they've learned. And then listen later as a way to review their learning.
Language Practice: Podcasting can be a fantastic tool for language classes. Students can practice speaking a new language, listening to themselves improve in their skills. Teachers can also model the language and have students playback and respond to the teacher in a podcast.
Exit Ticket: Students can respond to an end of day question by speaking their answer and recording it for the teacher or class to listen to.
Interviews: Students can interview each other in a couple of different ways. First, one can pretend to be a historical figure, author, etc. Second, interviews can serve as class introductions. Each student sharing their likes, dislikes, favorite foods and whatever else they can think of.
Explain a Concept: Great for math and science. Students can record themselves explaining the steps on how to solve a math problem or science concept.

Now that we know what podcasting can be used for, we need to find a podcasting tool that students can use. Three apps that are easy to use and classroom-friendly include:

Voicethread: Available for both the Chromebook and iPad, Voicethread allows for the creation of a thread topic, where students can respond. A great way for an exit ticket question posed by the teacher.
GarageBand: The only one of these that's iPad exclusive. Garageband is not only great for creating music but serves as a podcast studio as well, allowing students to record their voice only.
Synth: Synth is also available for the Chromebook and iPad. With Synth, teachers create a podcast classroom where they give the students the code to join. Students can post in the Synth class or respond to a teachers question.

Thursday, July 12, 2018

Great Apps for Assessment

With Chromebooks and iPads becoming more commonplace in the classroom, teachers are often looking for ways they can use the technology to assess their students. Below are a few recommendations.


Socrative: Use Socrative to give a multiple choice or true/false test. One of the great things about Socrative is that you can view your students progress as they take the test. Students can instantly get their results upon completion of the test. Upon giving the test, the teacher also has the option to let the students go through the test at their own pace or it can be teacher directed, going through each question one by one with the students. Test result reports can be printed or saved to your Google Drive. Socrative also has a student app for phones and tablets that makes it even easier to take the assessment.
Nearpod: The fantastic interactive presentation app, Nearpod, has a quiz element to it. Embed a quiz at the end of a presentation where the students have just reviewed the information. Nearpod makes it possible to add reference material to each question, such as a website, a picture, or a video. For example, include a map in a question and ask the students the relevance of the map. Include a drawing slide and ask the students to draw a flag or trade route. For math, ask them to solve an equation. Include an open-ended slide where the students address an essay question.
At the end of the assessment, Nearpod provides a detailed summary of how each student performed on each question type, whether it’s an open-ended question, a drawing question (which could be used for math to solve equations or draw maps), or multiple choice.
Google Forms with Flubaroo: Google forms is a great way to give students a formal assessment. But the power of Google Forms is amplified with the use of the add-on, Flubaroo. If you haven’t used Flubaroo, you owe yourself a try, it’s easy to use. Simply link your Google Form assessment to a Google Sheet. Install the Flubaroo add-on, and you’re ready to go! Take your assessment and set your answers as the answer key, so when Flubaroo grades the tests, it will grade them against your key. Once the test is graded, Flubaroo shines with the data it presents. If a majority of students got a question wrong, Flubaroo will identify that question by color coding it. And, students who scored low on the assessment will be color-coded as well on the spreadsheet — pretty cool. You can view a report showing the grade distribution as well. And lastly, the teacher can email a copy of the grade report to the student, identifying which questions the student did well on and which ones they didn’t.

Educreations: Educreations is a handy whiteboard app where students can record themselves explaining a concept. So, how can it be used for assessment you ask? Well, Educreations shines in the math classroom by asking students to explain how to solve math problems. Why not use it for assessment? Give your students problems to solve, then, ask them to work each problem out on a separate page in Educreations. When they’re done, they can copy the link of the assessment and paste it into their classrooms learning management systems such as Google Classroom, Edmodo, or Showbie for their instructor to view.

Monday, April 2, 2018

Technology Alone Won’t Help Your Students


A teacher recently told me that he has both a class set of iPads and a class set of Chromebooks in his classroom.  He went on to say that he has trouble deciding which to use on a daily basis.  This got me thinking.  It should never come down to trying to decide what technology to use, but it should come down to the learning objective or target.  

So I told them that although it’s great to be surrounded by technology, it doesn’t mean a thing if you don’t have a learning objective. If you don't have a learning objective, technology won't help you.  You don't determine the technology, the learning objective does the choosing for you.


The iPad or Chromebook is not the end all be all of education.  Technology is just a tool after all. If you don't use your tech with a purpose, those iPads might as well just be sitting in the corner of your room.  Your objective determines the tool that you will use. 

Those Chromebooks and iPads the teacher referenced are just tools. They are a means to an end. You don’t use technology for the sake of using technology, you have to know where you’re going first. Your objective must be clear and concise, then determine which tool you will use. 


If you know me or read any of my other pieces, you’ll know I love technology!  Walking into a classroom that’s equipped with iPads, Chromebooks, or even Windows laptops makes me think about the possibilities of the extent of learning that can happen in the classroom. But at the same time, I know those iPads are just a means to an end. Making the technology effective begins with the days' target. 

If you want the students to write a short essay, perhaps using a Chromebook with its keyboard might be a better choice.  If you want to shoot and edit video, the iPad might be the tech of choice.  Now I know that not all teachers are lucky enough to have both iPads and Chromebooks, but the point is, you shouldn't use whatever tech you have just for the sake of using it.

A coherent and clear objective begins with SWBAT.  Objectives should begin with the words “Students will be able to...”.   At the end of your lesson, what will your students be able to do?  Then, once you've determined that, ask yourself which tech tool is a better choice.  Or, in most cases, it's not which hardware will work best, but which app suits the assignment.

Again, if you don't have a clear objective, technology won't help your students.


Wednesday, March 28, 2018

22 Ways Students Can Demonstrate Their Learning


Think of this as a compendium to my last post about students creating content.  This time, my focus is not on the creation of content, but ways that students can demonstrate what they’ve learned.  Twenty-two apps that can help students show-off what they’ve learned include:

1. Annotable:  A fantastic tool to annotate pictures or documents.  Students can annotate pictures they’ve taken, labeling different aspects of the picture.  In biology class, students can take pictures of plants etc. and label the parts.

2. Skitch: A great annotation tool.  Use it to annotate pictures, drawings, documents, etc.  Students can use it to label certain aspects of a picture.  They can use the picture of a particular person and label their attributes and/or accomplishments.

3. Popplet: Students can use Popplet to create a web of knowledge.  They can use it to explain a concept, map out a family tree of a famous person, or create a timeline.

4. MindNode: Great for thought-mapping.  Use MindNode to create timelines, explain the process of a science experiment, or show how to solve a math problem.

5. Explain Everything: A digital whiteboard.  Students can record themselves explaining a concept while they use the digital whiteboard to show what they’ve learned.  Then, show it to the class.

6. Educreations: A fantastic digital whiteboard.  Students can use Educreations to record themselves explaining how to solve a math problem or explain certain aspects of history.  Then, when done, show it to the class.

7. Shadow Puppet EDU: Create videos.  Include voiceover narration with pictures and graphics.

8. ShowMe Interactive Whiteboard: Students can demonstrate a concept or explain the significance of a person or event through their white board.  Students record their report and can play it back for the class or export it to the teacher.

9. iMovie: What better way to show off you you’ve learned than to make a movie about the topic.  No matter the subject, from math to social studies, students research their topic, film it, and present it to the class.

10. GarageBand: Students use GarageBand to record a podcast about their topic.  They can record an audio report or a conversation between two or more people.

11. Recap: With Recap, the teacher poses a question where students can respond with text or a video reply.  Other students can join in by replying to each other’s post with a video or text.

12. Flipgrid: Using Flipgrid, students video record their responses to a question.  Or, like Recap, they can comment on each other’s post.

13. Paper by 53: Paper is a drawing tool for iOS.  Students can use Paper in a multitude of ways, from drawing a concept to  writing text.

14. Paste by 53: Paste is available as an iOS app or a web application.  Paste is a presentation tool of sorts in that it allows the user to create presentation decks from screenshots, videos, docs, as well as links to other sites.  Works great with its sister app, “Paper by 53.”

15. Keynote/Google Slides: Whether your class is using iPads or Chromebook’s, Apple’s Keynote and Google Slides are a great way for students to present information on their topic.  Each app allows for the insertion of pictures and video to accompany their text.

16. YouTube: Students can share what they’ve learned using YouTube.  The teacher sets up their own YouTube channel where students can upload their videos about their topic for the class to view.

17. iBooks Author: Using a Mac, students create their own digital books about a topic, including videos, recordings, and other interactive elements.

18. Seesaw: Seesaw is the ultimate in digital portfolios.  Students can upload their work to their Seesaw journal or address prompts from the teacher right in Seesaw.  A great way to show what students have learned over the course of a semester or year.

19. Weebly: Using Weebly, students can create a website about their topic.  Whether it’s a historical figure, event, or science topic, a website is a great way to have students research and present a topic.

20. Animoto: Ask students to use Animoto (iPad) to create video essays.  Student simply important the pictures, such as a historical figure, then choose the music and video style and off they go.  Add to the video with captions explaining the pictures and topic.

21. Grafio 3: A mindmap and diagraming tool.  Grafio for iOS allows students to create how to diagrams of ideas and concepts.  Students can create tree maps of historical figures and events.

22. Stick Around: Turn the tables on your students.  Instead of you creating the quiz on a topic, ask your students to create a labeling quiz for their fellow classmates.  Stick around is an iPad app that allow's students to create their own labeling quizzes.  In creating a quiz, students must provide the answer key.  In order to create the questions, students must know the answers.

Sunday, March 25, 2018

10 Ways Students Can Create Content Using Tech


I recently read an article that talked about how Chromebooks were being underutilized.  Instead of being the creation machines that they can be, many teachers were using them simply as an extension of paper.  Most of the work being done on Chromebooks was work involving Google Docs, such as writing.  

Such was the case in an iPad classroom I visited recently.  The students had written a short essay on a piece of paper and were typing the report into the Pages app on the iPad.
Chromebooks and iPads can be so much more!  Now, that's not all bad.  Of course, there are times when students need to write that essay or report.  

So the article got me thinkin'.  What are some great apps students can use to create content and be creative using a Chromebook or iPad?  What follows are a few suggestions of how Chromebooks and iPads can be the creation machines they were meant to be:


1. Canva:  Ask students to create posters, infographics, or stories using Canva.  Canva has an iOS app or can be used via a web browser.  


2. Adobe Spark Suite: video, posters/infographics/collages, websites:  The Adobe Spark Suite can entice students to create work where they can show off what they know.  The Spark suite offers apps for iOS and can be used via a web browser, perfect for the Chromebook classroom.  Let the students choose how they'll express themselves by presenting them with the suite.  They can create a web page, a poster, or a video showing off what they’ve learned.  Simply point them to the suite and let them choose the app.

3. Book Creator:  Ask your students to write a book.  Well, we’re not talking a novel, but a short book with pictures and everything.  Book Creator can be used on iPads or via a web browser.


4. VoicethreadStudents can use Voicethread to narrate a story using pictures and voice.  Ask students to explain a concept or teach an idea.  Students can use Voicethread to debate an issue, discussing the pros and cons of an issue.


5. iTunes U: Specific to the iPad, iTunes U is an Apple education app where students can take a course.  But, you can turn it around and ask the students to create their own course about a specific topic.  Ask the students to create readings, review exercises, and tests around their topic.  

6. Google Sites: Ask students to create a website about a topic or person.  The site can serve as a sort of website biography of a famous person or students can use it to post information about a topic.

7. Garageband/Soundtrap: Ask students to create daily podcasts about a particular person or topic.  Have students create a theatre of the mind project where they perform an audio play about a person or topic.


8. Comic Life 3: Ask your students to create a comic book using their iPad.  Have students collaborate on a single comic, have them work in small groups, or ask them to go solo.  Instead of simply writing an essay or a report, take it to another level and have your students use Comic Life to incorporate graphics and pictures into their report or essay.  Students can use Comic Life to bring their writing to life using their creativity and imagination.


9. WeVideo: Ask students to use WeVideo to edit their created video.  Available for both iOS and as a web-based app, WeVideo is a great and easy way to upload a video, edit it, and then download it back to your Google Drive or show it.


10. Clipchamp: Before using WeVideo, Clipchamp is a very good option for students using Chromebooks to shoot their video.  It’s easy to use and easy to export your video to Google Docs or WeVideo.


Wednesday, April 5, 2017

Seesaw: A Digital Portfolio App for the 21st Century


Paper is out. Digital is in. Seesaw is an awesome digital portfolio and blog where students are empowered to document their learning in their class. It’s very easy for students to sign up. They can sign in using a QR code or through an email or Google account.
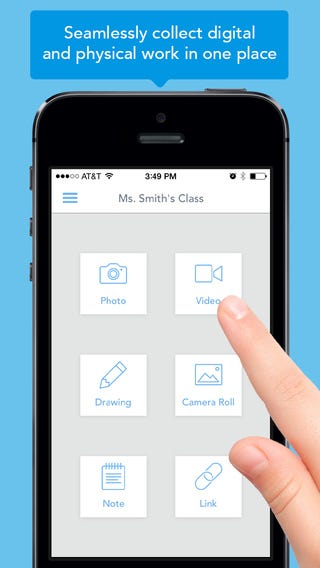
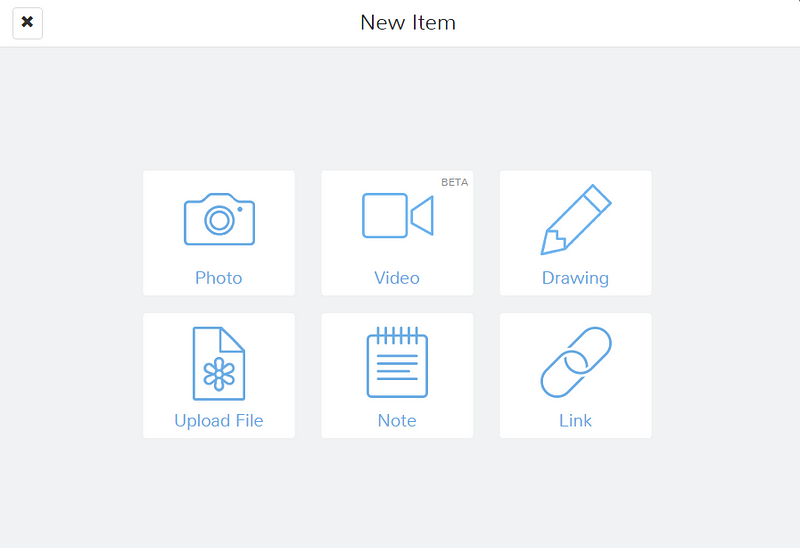
Students can capture their work in a variety of ways. They can document their work in a variety of ways. They can insert something from their camera roll or take a picture of a project or assignment and insert it from there. Seesaw also gives them the option to shoot a brief video about their work or project and insert it into the platform. They can include links to a particular website or draw on a blank canvas. Lastly, they can write a note or short essay and include it in their portfolio.
Students can collect their work from any device. They can leverage their PC or Chromebook camera. There is an app for Android, iOS, and ChromeOS. It’s great in both Chromebook classrooms and iPad classrooms as well.


Seesaw also provides the teacher with the option to create a class blog based on student work. The teacher can take student work and post it to the class blog, therefore, everything goes through the teacher before being posted to the class blog. The blog can be accessible with or without a code. This really gives students ownership of their work, knowing that there will potentially be many other people that will see it.
Another cool aspect of Seesaw is that parents can have access to their child’s work in Seesaw. So, instead of asking what their child did that day — they know! Parents can bring up an assignment with their child instead of the other way around.


Keeping with folders, student portfolio work can be assigned to as many folders as needed. For example, if a teacher wants to organize work according to topic or chapter, simply create a folder.
One of the ways that that Seesaw is worth its weight in gold is its usefulness at parent-teacher conferences. Instead of tracking down student work, simply take along your iPad or laptop and open up their portfolio. If a teacher wants to set aside student work for a parent/teacher conference, simply create a folder for certain work. It’s that easy!
If you’re looking for a digital portfolio for student work, look no further than Seesaw! For more info, check out Seesaw at http://web.seesaw.me/

Sunday, August 21, 2016

Rough Draft: A Mac and iOS Writing Tool for the Classroom


Rough Draft is a writers tool that educators using iPads may want to consider.  Rough Draft is a text editor that's been available for the Mac and has recently become available on iOS.  It's the app that constantly reminds you that you are working on, as the name implies, a rough draft. How does it do this? Well, when working in Rough Draft, there is no delete option, only the ability to strikethrough. By doing so, you are constantly reminded that what you're working on is only a draft.
How does this help someone write? By having the ability to see the strikethroughs on the page, you are more likely to continue your work without pausing to figure out just the right line, phrase, or word to include in your document. You can do that later. Right now, the important thing is to your get your thoughts out of your head into the computer. This, in essence, sets the writer free and enables them to be less careful and more carefree when writing their document. All too often we edit while writing, ultimately taking way too long to get our ideas out. The point is, you want to stay in the flow and not pause. The makers of Rough Draft, 96 Problems, say that when you type a document on a computer, you are given the impression that its permanent, so you spend time perfecting your document while you write. Before you know it, that 500 word document you sat down to write has taken you hours. Rough Draft eliminates that.
Rough Draft also provides you with the ability to insert a placeholder in your text. Let's say you want to insert a picture or quote into your document but aren't quite sure which picture you want or what the perfect quote will be, you just know you want one in there. Rough Draft inserts a placeholder where you want to place the item so that you can come back to it later, when you're in the editing process. This is most certainly a timesaver. No longer are you pausing your writing to search for that quote or picture, you continue to write. And that's the purpose of Rough Draft, to keep you writing.
When you're ready to edit, you simply click "revise" and the strikethroughs are removed while the placeholders are kept in place. Your document appears as clean as can be. If you prefer to use yourfavorite text editor to do the editing and publishing, Rough Draft allows you to export your work.
When all you want to do is wrtie, Rough Draft is a good tool to not only have in your writers tool box, but in the classroom as well.

Thursday, June 23, 2016

Deckset: Presentation software for those on the go.


Deckset is presentation software, simplified. It’s easy to use and can be a very handy tool should you have to produce a presentation in a pinch. Deckset, brought to you by the folks at Unsigned Integer, can take your notes and/or simple text that you’ve put into your favorite markdown text editor and translate them into an attractive presentation. It’s essentially a minimalist text editor for presentations. To effectively use Deckset, you should be familiar with markdown formatting.

Where Deckset really shines is in how it saves you time. You won’t have to spend a lot of effort putting slides together as you might with more elaborate software such as Keynote or Powerpoint. And, as the description of the software states, it not meant to replace either of those powerful programs.

It comes with many handy themes and the ability to change them on the fly as your taste suites you. If you find yourself pressed for time or simply want to add a brief slideshow to accompany a presentation, type a few handy terms or sentences into your favorite text editor, open Deckset, and you will be prompted for a markdown text file to translate into a new presentation. Choose the appropriate text file and there you have it, a presentation is created with little or no effort.

Many times, we spend too much time adding pictures, editing transitions, and manipulating the text in our presentations. Deckset allows us to focus on what we want to say and not spend all of our time focused on designing the slides.
To learn more about Deckset, it can be found in the Mac App Store or at the Deckset web site http://www.decksetapp.com.

Monday, June 20, 2016

Create Fun Study Guides with iBooks Author!


When iBooks Author for the Mac was first introduced, it was seen as fairly revolutionary. One could easily create their own textbooks and, furthermore, publish them in the iBooks store for all to read. The authoring Mac app makes it easy to not only publish your own textbook or novel (or short story for that matter), but it’s a great way to create interactive study guides for your students.

Provided your class has access to iBooks, iBooks Author provides the teacher with a fun way for students to not only learn new content, but review content as well. Most of today’s students are familiar with technology and have grown up with it. They’ve become accustomed to interacting with content, rather than just looking at something on a page. iBooks Author allows students to interact with slideshows, videos, and 3-D content like never before.

As a study guide, the books you create in iBooks Author allow the students to take notes right in the textbook. They simply swipe the content they want to add to their notes. Then, after their not taking session, they can change to note view to view all of the notes they’ve taken. Furthermore, the notes the students take appear on study cards, where they can add such things as definitions to vocabulary words to the back of the card.

Upon starting iBooks Author, you are presented with numerous templates for which to begin putting your book together. Choose the template that best fits what you want to do and your off! If you can drag and drop, you already know how to use iBooks Author. You can drag Pages or Word documents into your book, add Keynote presentations, or even add a short movie to help get your point across.

iBooks Author is a great way for students to interact with content. As a teacher, you can imbed your notes and presentations. iBooks Author is a tool that teachers can use to either provide study guides or provide a powerful, interactive supplement to their textbook.