The EdTech Coach Podcast

Showing posts with label Education. Show all posts

Wednesday, February 2, 2022

The Importance of Student Engagement and the Apps That Can Help


Engagement is the key to any lesson. Engagement makes it easier for students to learn, increases motivation and fosters creativity. But engagement doesn't only improve academic performance. Engagement boosts self-esteem, confidence, and resilience in students as well. And this happens even more through interactive lessons.

Interactive lessons and engagement go hand-in-hand, and the best way to create engagement in your classroom is to use interactive apps. With Chromebooks and iPads taking over, there are multiple ways to incorporate engaging lessons into your classroom with the use of technology.

So what makes an app engaging? For one, it should provide students with instant feedback and rewards. It should also cater to many learning styles and engagement methods. 

Here's a  short list of engagement apps that can be used in your classroom tomorrow. 

Nearpod:  Nearpod is an app that lets teachers post  interactive lessons online or using the Nearpod app, which students can download on their personal devices. It allows the teacher to add activites to slides. You can upload your old and tired slides and modify them to make them more engaging or create new one's right in the Nearpod app.

Pear Deck:  Pear Deck supports the work of teachers in that it makes your Google Slides more engaging by allowing the teacher to insert questions, videos, and other interactive activities. It's an engagement app that gives students a better way to participate in classroom discussion and lectures.

Quizlet Live:  Quizlet Live iallows students to take quizzes and tests right on their devices. Teachers can also use it to give live feedback to their students on topics.

Quizizz:  Quizizz lets students play live quizzes with other classmates. It's a great engagement app that can be used to review for big tests or practice the material that's currently being studied. 

Gimkit:  Gimkit is an app that lets students make their own quizzes while they learn. It's perfect for engagement with lessons that require some form of test beforehand, such as history lessons. 

Kahoot:   Kahoot takes live quizzes and turns them into engaging games. It's perfect engagement app for review before big tests or just to introduce engagement with new topics.

Socrative:   Socrative is an app that allows teachers to create their own quizzes or practice problems right on their devices. It's a great engagement app for quizzes after a lesson has been taught, or simply to introduce engagement with new  material. It also has a game element where students comptete in answering the correct answers to questions. Students can participate online or through the Socrative app.

Kahoot, Quizizz, Gimkit, and Socrative are engagement apps that allow teachers to create their own questions or quizzes for their students, while Pear Deckand  Nearpod are engagement apps that let teachers create engaging lessons using slides for their students. 

And Kahoot, Quizizz and Socrative can be used to review material before a test. 

Classrooms have gotten a lot more interactive since the rise of technology. As you read, there's a wide range of apps that you can use to interact with your students and get them motivated in learning. Make your class engaging today!

Monday, March 9, 2020

One of the Most Important Digital Tools in Your Classroom

In light of current health concerns, many students are missing class. Because students are asked to stay home with the slightest symptoms of a cold or flu, it’s important to keep your students aware of what you’re doing in the classroom. With technology it’s even easier to keep your students up to date with the classroom activities. One of the most important tools you can use in your classroom is an online calendar. If you use Google Classroom, it’s already built in. If students are home sick, they can access the calendar and find out what their class did or is doing that day. In Google Classroom, assignments are populated on the class calendar (if there’s a due date for the assignment). But what about the day in day out activities of the class? Perhaps you had a discussion about a topic. That particular day you read a passage from a book or watched a video clip. These activities may not qualify as classroom assignments with due dates. This is why it’s important to get in the habit of posting daily activities on your classroom calendar.

Monday, December 30, 2019

My Favorite EdTech Apps of 2019

This year brought a slew of apps to teachers. Even though they aren’t technically new, they were new to many teachers who tried them out for the first time. As a technology coach, part of my job is to find those apps that teachers can easily pick up and and play, so to speak. That is, that they’re easy to learn and easy to use in the classroom. I want teachers to see how accessible an app is. The last thing I want if for a teacher to be overwhelmed by learning a new app.

Below are five apps that I found easy for teachers to learn and, most of all, were easy to implement in the classroom in 2019.

  • Equatio. Equatio is an easily accessible math app that allows teachers and students to insert math into their Google Documents. Equatio is not only great to use with Google Docs, but it works well with Google Forms as well. Equatio solves that eternal conundrum of working with math on a Chromebook.
  • Nearpod. The first of the interactive presentation apps on the list. Nearpod is great in that it provides total classroom engagement through it’s interactive presentation lessons. Nearpod provides everything from short answer, to drawing, to quizzes. Nearpod provides an end of session report, showing the teacher where students excelled and what they need to work on.
  • Wakelet. Wakelet was app that I discovered this year and shared with teachers. Wakelet is essentially a curation tools that allows for so many other uses. Wakelet can not only be used to collect resources for students or fellow staff, but it can serve as a class website and student portfolio as well.
  • Google Forms. Of course Google Forms has been around for awhile, but now that many schools are going 1:1, it’s getting used more and more. Google Forms is great for using in an opening warm up activity, posing inquiry questions or as an exit ticket, asking students what they learned that day. It’s great for assessment too! One thing that took it up a notch was the new “Locked Mode.” Essentially locking down students Chromebooks while their working on an assessment.
  • Google Classroom. In the age of a Chromebook classroom, a classroom management system has become a must, and Google Classroom is one of those that teachers have come to rely on. Google Classroom serves as the classroom hub that turns your classroom into a paperless one. From distributing and collecting work, to posting announcements and having online discussions in the stream, Google Classroom has proven to be a valuable teacher tool.
  • Pear Deck. Another totally engaging classroom presentation tool. Pear Deck, like Nearpod, engages students in activities while the teacher presents the lesson. Students take part in the presentation using drawing tools, answering questions, watching a video, hovering a selector over the right answer, or taking a quiz. Like Nearpod, Pear Deck allows for a report for the teacher to review student data of the lesson.
If you haven’t explored the above digital tools, you owe it to yourself to make your 2020 school year a more productive and engaging one by checking them out.

Thursday, December 19, 2019

Blogger in the Classroom


Blogger is a fantastic blogging platform (I’m a bit biased). Not only is it great for personal blogging but It can be used in many different ways in the classroom by teachers and students.

Teachers

  1. Share what’s going on in your class. Write about the daily goings on, from what students learning to projects they’re working on.
  2. Self reflection. Keeping a journal can help a teacher reflect on their day.
  3. A staff blog. I’ve written about this before. Create one blog for the school site and ask the staff to contribute.
  4. Share notes and assignment directions with your students.
  5. Weekly updates. For the administration, use Blogger to share a weekly update about what’s going on around the campus as well as upcoming events.

Students

  1. Student journaling. Students can use Blogger to keep a daily journal, sharing it with their teacher.
  2. Assume an identity. Students can assume the identity of a historical or literary figure and blog as if they were that figure. What kinds of things would they say?
  3. Exit ticket. Student can use Blogger as a daily exit ticket, reflecting on what they’ve learned that day. A great way to keep a journal of their learning.

Google Sites in the Classroom

Some districts are opening up the use of Google’s web site creation tool, Google Sites. Although they’re Google districts in that they use Google tools such as Classroom and Docs, Sites sometimes can take time for districts to warm up to, citing student privacy concerns and hard to manage what exactly gets posted to the site. Anyway, with some districts using Google Sites now, I thought I’d put together a few ways the digital tool can be used in the classroom.

  1. Post student work. Students tend to give a bit more effort if they know their work is going to be published for all to see. You can create a site that’s strictly for sharing student work. You can upload a variety of things from an image, to a video, to a Google Doc. Then, share the site with parents and staff.

  2. Keep parents in the loop. Create a site that’s strictly for letting parents and guardians know what’s going on in your classroom. From topics being covered to what the students are working on.

  3. Insert a contact form. Use a site that enables parents or guardians to get in touch with you. Insert a Google Form that includes their name, contact information, and why their contacting you.

  4. Embed a calendar of classroom and school events. Use a site as a calendar. Insert a calendar that includes school and class upcoming events.

  5. Supplement your lessons. Use a site to supplement your lessons. Perhaps you want the students to research or put together a project using only the supplied information. Direct them to your site. Everything’s in one place for them to conduct their research.

  6. Keep a classroom blog. The obvious, keep a classroom blog. It can be a personal diary of sorts. It can you reflect on your day and teaching practice.

  7. Create a page that explains lessons and provides directions with examples. Use the site to post examples of student work or detailed directions on an assignment. If students have a question about an assignment or want to see a examples, simply direct them to the site.

Tuesday, November 26, 2019

Create Staff Community & Collaboration With One Blog, Many Teachers


Student blogging in the classroom is great for many reasons. But, the blog can be great for teachers as well. I'm not talking about a single teacher and a single blog. What I'm talking about is one blog for many teachers! One teacher sets up the blog, then invites the staff to be contributors. And there you have it, a staff blog!

There are two ways to put together a staff blog. One is to have teachers post whenever the mood suits them. You could have a few blog posts a day or if no one wants to get the ball rolling, no blog posts for a week or even longer. It's because of this I prefer the second way, to create a schedule where each teacher posts during a given week. That way, you're guaranteed a post a week.  So, for example, Teacher A posts something in week one, Teacher B posts in week 2 and so on.

The first question you may get when asking teachers to blog is "what should I write about?" The post should be about education, not what their weekend plans are. They can write a post about what they're doing in class and share exemplary student work. Teachers can blog about current events in Edtech or education in general. They can share lesson ideas and best practices.

There are a couple of reasons why blogging in school can be an effective tool. First, it can build a sense of community. Teachers can feel like they're in this together as a staff. They are all part of a blog that represents the staff. Commenting and responding to comments can also build community.

Second, a staff blog can serve as a collaborative professional development activity. Teachers can get lesson ideas and best practice ideas from each other's posts.

So, as you can see, there are many benefits to staff blogging.  So why wait? Get blogging!

Saturday, May 18, 2019

How To Have A Paperless Classroom


There are many apps for education. The key is to find the select few that fit your needs.  You don’t want to inundate your students with dozens of apps, confusing them as to which app is for what. In the long run, it will be easier for both you and your students if you concentrate on only a few.  Experiment with different apps until you find those that fit your needs. 


As I mentioned in a previous post, there are many reasons to go paperless in your classroom.  There are three categories that apps fit in that will allow you to go paperless.  Choose an app from each of the three categories and your well on your way to having a paperless classroom.

Classroom Management/Distribute Work

First, you need a place where students can retrieve and turn in class work.

Start with a learning management system. An LMS can serve the purpose of collecting and distributing work.  LMS’s such as Google Classroom, Edmodo, Schoology, and Showbie are popular LMS’s that can help with the everyday tasks or running the classroom.  Each learning management system is able to collect and distribute work. Find the one that fits your needs and you’ll find you’re on your way to going all digital!

Student Work

Just because there’s no paper or pencil doesn’t mean there isn’t work to do.  Students still need to get their work done in a digital environment. The following are a few suggestions for apps students can use to get their work done:

Seesaw: A very good all in one student portfolio/online class blog/LMS/student journal.  Seesaw is great for collecting student work and sharing it online via its online class blog functionality.  

Kami: If you use Chromebooks in your class, Kami is a must!  Kami allows for the annotation of PDF documents.  So, you don’t have to thing twice about assigning a PDF document to students because of the inability to type on it.  Students can upload their work to Kami and type away.  Upon completion, they  download their finished work and uploading it to the LMS.

Google Tools: Again, if you’re using Chromebooks, Google tools such as Docs, Sheets, and Slides is a no brainer.  Assigning and turning in Google Docs is easy, especially if you use Google Classroom. 

Nearpod: Nearpod is a fantastic interactive presentation app that allows you to lead your class through an interactive lesson without touching a piece of paper!  Your students can interact with your lesson in a variety of ways, from short answer, to collaborative exercises, to drawing activities.  

Explain Everything: Explain Everything is a digital whiteboard app that allows for the recording of lessons by not only the teacher, but students can also record their work as well.  Want students to explain a concept? Have them use Explain Everything and a stylus (or their finger) to record their answer, then upload it to the class LMS.

Assessment

Out of the multitude of apps that are available to serve as assessment tools, I’ve chosen three that can serve your assessment needs:

Nearpod: Nearpod was mentioned before as a good way for students to show their work.  It’s also is a good assessment tool.  Built into Nearpod is a formative assessment tool where you can craft multiple-choice questions to assess what they’ve learned.  Or, you can use Nearpod as one big formative assessment tool, posing questions using the various interactive question types.

Socrative: Socrative allows teachers to post multiple-choice, true/false, or short answer tests.  The teacher gets real time feedback as far as student scores and test progression.  And, students appreciate how they get immediate feedback either during the test or after.  

Formative: Formative is unique in that there are 1000’s of pre-made “Formatives” to choose from.  Find one that fits your subject and edit it to fit your specific class needs.  Another cool thing about Formative is that it allows you to upload your own document.  Let’s say you’ve got that time tested test you’ve used for years.  No need to come up with something new, upload your document  into Formative and insert places where students can provide the answers to the questions.

Saturday, May 11, 2019

Why You Should Go Paperless in your Classroom


Save a tree!

Back in the day, you might find a classroom full of paper. Stacks of extra worksheets on a table. The teachers' desk is stacked high with student work, waiting to be reviewed and graded. There’s another stack waiting to be passed back to students.

The point is, the classroom was drowning in paper. And, unfortunately, this isn’t only a thing of the past. Some classrooms today still resemble the one I described. What makes it worse is that many students are equipped with tech, whether it’s iPads or Chromebooks!

There are a number of reasons to go paperless in your classroom:

1. Remove class clutter. No more stacks of paper in your class, whether it’s on tables or on a Teachers desk.

2. All that waste! Let’s face it, some of that paper, whether it’s student work or extra copies, ends up in the trash. Teachers make a couple extra copies of stuff just in case. Well, if those copies aren’t used, they end up in the great receptacle in the sky.

3. Student returned work is a whole other matter. As teachers, how many times have you passed back student work only to see it in the trash at the end of class?

4. Save time. How much time have you wasted standing in line waiting to use the copy machine? Or, how much time do you use waiting for your copies? If you add it up, probably a lot!

5. Plus, going digital eliminates you wondering if the copy machine even works! We’ve all been there. You go to make copies only to find that the machine is being serviced, out of toner, or just plain broke and is awaiting repair. Going paperless eliminates all of these copy machine nightmares!

6. Going paperless means never having to worry whether or not you’ve made the right amount of copies.

7. Rationing paper is a thing of the past. Some schools provide a case or two of paper for a semester or a year. Some teachers find that with a few weeks to go, they are down to their last ream of paper! Digitizing class work or other handouts will remove this anxiety.

8. Lastly, going paperless means preparing students for the future. Much of what they’ll be doing in their adulthood will be digital. One reason why Chromebooks are so popular is because of all the things that can be done through a browser.

Sunday, April 28, 2019

Reach Every Student While Making Them More Productive With ClassroomQ


You're a math teacher.  You have a classroom of 30 students.  You've assigned ten problems for the students to complete in class. It's a new concept so you expect there to be questions from the students while they work.  In the old days, BT (Before Tech), if a student had a question, they would raise their hand and wait for the teacher to help them. 


Today, there's an app called ClassroomQ. ClassroomQ is a web app that allows students to ask for help using any device that can access the web.

ClassroomQ is very simple to use for both the teacher and the student.  To create a queue, the teacher creates an account and a class code.  On the other side, the student clicks the student button, enters the class code and their name, and they're in!  If the student has a question, clicking the big red button on the web page will put them in the class queue, awaiting help.

ClassroomQ can be useful in your classroom in many ways:

1. Makes sure that students with questions get help.  Never have a student get frustrated and put their hand down, thus not getting the help they need.  Students put their name in the queue, ensuring they get the help they need.

2. Saves time.  The student no longer wastes valuable class time holding their hand up, waiting for help.  While waiting, students can move on to the next question.

3. Reach every student.  Shy or timid students are no longer missed because they are afraid to raise their hand or ask for help.  There's no hand raising or trying to get the teachers attention involved. Putting their name in the queue ensures they get the help they need.

4. Works great on any device, even smartphones.  Even though it's a web app, it still functions great on a mobile browser.  The teacher can use their smartphone to check the queue.  The student also has the option of logging in with their phone (provided they can use it in class.) Classroom Q works with any device that has web access.

5. Very easy to use. Students click the "Student" button, enter their name and class code and they're in!  All they have to do is click the big red button that puts them on the queue.

6. Great for homework questions. The teacher has the option to allow student comments in the queue.  While this may not be too necessary for the classroom, it can serve a great purpose for student homework.  Open a queue after class allowing students to ask questions about their homework.

ClassroomQ is a gem of an app that will help reach all of the students that need help.  Highly recommended for larger classes.

Saturday, April 13, 2019

The Value Of Recording Directions and Lessons For Your Class


Two examples of how recording your directions and lessons could be beneficial to students:

1. In a science class where the teacher is giving directions on how to perform an experiment.  Although the teacher was out near the center of the room, some students strained to see her giving directions.  Also, the students are at different angles of viewing, making it difficult to see the directions.  When the students are asked to complete the experiment, a few students are stumped because of their inability to observe the directions.  They tried asking their classmates, who were busy with their own experiment.  Students raised their hand, hoping the teacher will would repeat the directions, but she is busy answering questions from other students.  Needless to say, the students are frustrated.

2. In math class where the teacher is explaining how to solve an equation.  He explains each of the steps.  At the conclusion of the example, he asks the students to solve the same type of equation.   Although the students can see the example on the board, a few couldn’t remember exactly how the teacher arrived at certain numbers in the steps of the equation.  A student raises her hand asking “how did you get the 5 again?”  Again, like the science example, the student checks with her neighbor, who is busily trying to solve the equation.  She raises her hand, and patiently waits for the teacher, who is helping other students.  

The two scenarios show the value of recording your lessons and/or directions.  But how can a teacher record their lessons or directions to a project?  There are a number of digital whiteboard apps that can be used for math, such as Educreations, ShowMe, and Explain Everything.  The math teacher can record themselves working out the problem beforehand, then post it to the class LMS, such as Google Classroom for students to review.  It works great for not only students that may need a second or third viewing of the process of solving and equation, but it’s also great for those students who may have missed that days lesson.  They can access the recording as if they were in the classroom. 

For the science class, record the directions on how to perform the experiment beforehand using a smartphone.  Then, post it YouTube or Vimeo.  From there, upload the video to your LMS.   

Great for Study Time

And...Having videos of the teacher explaining concepts can be beneficial for students to review when test time rolls around. 

Wednesday, March 27, 2019

Five Apps for Taking Notes On Class Reading


I was observing an English class recently where the teacher was discussing a piece of text with students. He was telling the students what the text was about while the students listened. Student engagement was at a minimum, with the students at the front of the class occasionally engaging with the teacher while the students in the back seemed to be counting the minutes until class was over. 


It must be said that this is a one to one classroom, where each student has their own Chromebook. Never mind that engagement was at a minimum, but the students had technology that could have made the whole process easier for the teacher to check for student engagement while being more engaging for the students!

Three apps that can help engage your students when discussing a text passage in the classroom are:

Google Slides:  Students can use Google Slides to summarize information and keep it nice and orderly. Simply title each slide by chapter or even paragraph.  Each slide can contain a summary, a wondering, or even discussion questions that pertain to a particular part of the text.

Kami: Kami is a fantastic pdf online annotation app that works great with Chromebooks.  Students can upload the document into Kami then annotate with text and highlights. Or, if the teacher has a pre-made note sheet, they can upload the document as a pdf where students can then upload the note sheet to Kami, complete the sheet, then upload it to an LMS such as Google Classroom

Google Keep: Google Keep is an indispensable notes app that ties neatly into the Google ecosystem.  It's on the students Chromebooks, making it ready to use.  And, one of the cool things about Google Keep is that it goes everywhere there's an internet connection.  Students can access their notes from virtually any device with an internet connection.  And, when the teacher wants to check student notes, students simply share them with the teacher via the share button.  No paper collected or returned.

Nearpod: Nearpod is a very good interactive presentation app that works well with both iPads and Chromebooks.  Use the open ended question option in Nearpod and attach the document for reference.  Ask students to summarize a chapter or paragraph per slide.  As the teacher, you get instant feedback on your own device as students submit their responses.

Google Sheets: Did you know that a spreadsheet could be used to take notes?  Well, it can.  Fill column A with chapter or paragraph numbers.  Then, title the rows as necessary with such things as summary or with questions.   

Saturday, March 23, 2019

Two Apps That Will Move You Toward A Paperless Classroom


I was recently in a Social Studies Department meeting.  The topic turned to a discussion about when they’ll get more printing paper for their classes.  Not being familiar with the number of cases of paper teachers received from the school, I asked how much paper they were given.  I was told they received a case of paper per semester. 


They noticed my surprised look and stated that it was still not enough.  And, here’s the kicker, their students have Chromebooks assigned to them! It’s a one to one school!

There are many reasons to go paperless with some classroom assignments, among them is time saved at the copy machine.

Teachers could save a lot of time by going paperless with these apps:

1. If you’re using Chromebooks in your class, you gotta check out Kami.  Kami is a fantastic PDF annotation web app.  Students can open up a document in Kami, annotate to their hearts content with text boxes, highlights, or with their stylus, and then upload it to your LMS.

2. Whether you’ve got iPads in your class or Chromebooks, the Showbie app is an easy way to go paperless in your classroom.  Showbie is available on the web as well as an iOS app.  Upload a PDF to Showbie and students can annotate with a text box or drawing tool.  Showbie also allows students to highlight text.  One of the really cool things about Showbie is the ability for students to leave a voice note on a document.  Showbie can also serve as an LMS of sorts in that you can distribute and collect work. 

Monday, March 4, 2019

Apps Your Students Need To Be Familiar With


Teaching in the age of technology is a great thing.  The multitude of apps available to help you teach is too many to count.  But there are certain apps that your students should be familiar with.   Why?  Well, there will come a time when you don't have time.  What I mean is that you may need to come up with a quick lesson in a pinch.


Most of us have been there.  You decide at the last minute that you need to take a sick day.  There may be an occasion where something comes up, prompting you to have to leave school early.  The bottom line is, you have to come up with a lesson plan for your students, and quick.  That's where the power of apps comes in.  Some apps come with their own lesson store.  You can browse through the app's own store and find a lesson you deem appropriate for your students to do. 
Below are five apps that come with their own lesson store. 

Nearpod: Nearpod has a multitude of ready-made lessons that you can download and edit as needed.  Granted, some a cost a few bucks, but others are free.  But once you buy it--it's yours to use over and over!   Click "Explore," and you're presented with lessons based on categories like "subject" or "publisher".  You can preview the lesson before adding it to your library.

Formative: Formative also has a good selection of already made Formatives. Type in the subject and choose the Formative that works best for you. Download the lesson and edit it as you see fit.

Kahoot: Have your students learn new or review content!  Finding a Kahoot that's already made is one click away.  Click "Explore Games" and then choose the Kahoot that fits your class.

Flipgrid: Flipgrid has a variety of topics your students can address.  Journey back to the late 1970s and click on the "Disco Library" tab. Select your audience, topic subject, and goal.  If you find a Flipgrid you like, select your grid and add it.

Seesaw: If you're using Seesaw in your class, you must check out the Activity Library.  If for no other reason than to get ideas on how to use Seesaw in your class.  If you find an activity you like, click the "share" button and choose the appropriate class to assign the activity to. 

Friday, March 1, 2019

Liven Up Your Staff Meeting With These Apps


Come on, you can tell me.  We’ve all been there.  Whether you’re in education or some other profession.  We’ve all been in those staff meeting where your attention is everywhere other than on the material at hand.  Your eyes wander.  You can hear your heartbeat.  You stare at the ceiling.  You resist the temptation to one of those people that stare at their phone all meeting.  Time crawls.  Minutes turn into hours.  The clock seems to be going backward.  You don’t want to be rude or seem inattentive, but you just can’t seem to pay attention.  The presenter drolls on, pretending that everyone is hanging on every word.  Come on, admit it, you’ve been in those meetings.

Don't let this happen at your meeting.

And now it’s payback.  The chickens have come home to roost.  It’s your turn to present in front of your colleagues.  You don’t want the staff to feel the way you do at some of these meetings.  What do you do?  Well, lucky you, it’s the age of technology in the classroom!  You’ve got a Chromebook, an iPad, or perhaps just a smartphone.  You are ready to make your presentation interactive and engaging.  But how do you do that?  Let me share you with you a few apps that you can use to keep everyone’s attention by engaging your audience.

When it comes down to it, school staff are much like the kids they teach.  In the same way, the students might get a bit fidgety when sitting in front of their teacher listening to the lecture for an hour, adults do the same thing when being asked to sit and listen to someone present information for a long period of time.  Just like in your class where you want to engage your students and keep their attention throughout your teaching, you want to have the same impact with the teachers you’re talking to.  And you know what, you don’t have to look far for the tools to help you because the apps used for your classroom can also be used in much the same way for a PD or presentation to your colleagues.

Socrative : Use the space feature to check for understanding or summarize the meeting. Create a Socrative quiz, then use it to summarize the meeting with a space race.  If you’ve got more than 20 in your meeting, simply have people pair up.  Give out a prize to the winner.

Kahoot: Use Kahoot to test the staff about the contents of the meeting.  Again, like the Socrative space race, give out small prizes for first, second, and third.

Padlet: As you’re giving your presentation, ask the participants to participate by putting very brief summaries of what you’re saying on a Padlet board.  Pause every so often to allow your fellow teachers to jot down a tiny summary of what you’re talking about.

PearDeck/Nearpod: I put these together because although they have differences, they’re kinda the same idea.  You present your information, then, embed small exercises in your presentation, such as a drawing exercise, a multiple choice quiz, or a short answer question.  The beauty of Nearpod and PearDeck is that you don’t have to leave your presentation to have your audience participate, it’s in the presentation.  Another fun aspect of the two is that you can share participant answers and drawings with the rest of the audience.  

Google Slides Q & A: If you’re using Google Slides to give your presentation, then using Google Slides Q & A is a must!  Ask the audience to not only ask questions or comments, but make it interactive by posing certain sceneries that concern your topic and ask teachers to respond in the Q & A portion.  For example, if you’re talking about classroom discipline, ask your audience how they would act in a certain situation.

Tuesday, February 26, 2019

5 Apps For Student Field Trip Reflections

Your students are going on a field trip.  Perhaps they're headed to a natural history museum or art museum.  You want to make sure they go away with something--anything that proves that the field trip was worthwhile.  The simplest thing to do is assign a reflection of what they learned on the field trip.  


Make sure students are aware of the assignment beforehand so that they can prepare.  Allow them to use their smartphones while on the field trip so they can take pictures or write notes about what they learned.  

The following apps will help students share what they learned on their field trip:

Google Slides:  One of the easiest ways students can reflect on their field trip is by creating a presentation about it.  Slides provide a couple of templates tailored to field trips-the field trip template or the photo album template.  Or, students can create a presentation from scratch. Students can insert pictures or videos they took of their experience.

YouTube: Students can use their phones to shoot video, edit it, and upload it to YouTube.  When shooting video, advise students that they should include a piece from the visit and their thoughts on the topic.  At the end of the day, ask them to film a reflection of what they learned.

Storyboardthat: Students can use Storyboardthat.com to upload a timeline of their learning.  Use each box to document the day. Students can upload pictures from the day and include written comments.

Book Creator: Students can use Book Creator to create a short book that shares their field trip.  They can add different kinds of media such as photos, video, and sound.  Book Creator provides the students with the ability to create a comic book style book that can showcase their field trip.

WeVideo: WeVideo is a free all in one video app that allows students to shoot and edit video.  WeVideo has an iOS app for those iPad classrooms and is available on the web for those Chromebook classes.  It’s easy to use and students can create and edit video right on their mobile device.  

Saturday, February 23, 2019

The Importance Of Immediate Feedback And Two Apps That Can Help

The other day I was observing a class.  The teacher did a formative assessment of that days learning by asking the kids to take out a piece of paper and answer the three questions she wrote on the board.  The students did so dutifully, pondering what they had learned that day. Some students wrote a few sentences for each questions while others wrote just a few words.  The students turned in their work in a tray at the front of the room and sat back down waiting for the dell to ring.
The bell rang and students exited the room, not knowing how they did on their end of the class assessment.  I asked the teacher when the students should expect to see the results of the assessment. She told me that she would get to it before the end of the week (it was Tuesday).

In an effective teaching practice, this should never happen, with or without technology.  I ask you, what’s the point of formative assessment if the students are not getting immediate feedback?  Isn’t the point of the assessment to find out where the students are in regard to their learning? What’s the point of getting feedback a few days later, after students have since moved on in their learning.  Because of that, the feedback won’t matter to them anymore. Most of the papers will end up in the trash after given back some days later.

This is where tech can help.  Feedback is important in the classroom for both teachers and students alike.  The students need to know where they stand in the learning process while the teacher should know how they’re doing in their teaching the material.  Are their methods effective in reaching their students?

There are a couple of apps that are not only great for giving feedback to students but they are great at giving immediate feedback.  ClassKick and Formative are two fantastic ways to see how students are progressing—in real time—and give the teacher the ability to give the student feedback on student work—as they’re doing it!

With student work being shown in real time on the teacher device, it ensures that each students work is being seen.  It replaces the old way of the teacher walking around and peeking over the students shoulder, hoping to get a good glimpse of student work.  Although it’s important for the teacher to continue to walk around, knowing that they’ll be able to view all student work in ensured.

The thing that makes both ClassKick and Formative unique is that they have the ability to show the teacher student work, as their working on it.  As the students is solving a math problem or writing a sentence, the teacher can see it all happen. Granted, with Google Docs, you can click into a students work and see how they’re progressing, but that takes an extra step.  And the way that ClassKick and Formative present students work, all on the teacher device in real time, makes it much easier for a teacher to monitor the students.

Again, immediate feedback is important in the classroom. Tech can help in the forms of Classkick and Formative.

Thursday, February 14, 2019

You Don’t Need Tech Management Software in Your Classroom


At a school where I was a tech coach, we used Chromebook monitoring management software.  It's the type that gives the teacher the ability to monitor what sites students visit using their Chromebooks.  One issue that teachers had was getting the software to work on a consistent basis. Some days it would work flawlessly, allowing the teacher to see all of their students Chromebooks, while on other days, it would glitch.  Some Chromebooks would be visible or the software just wouldn’t launch.  I found that many of those teachers that struggled to get it to work were turned off using technology in their class—period.  Some felt that they couldn’t conduct their lessons with the Chromebooks without the ability to monitor their students with the software.  

It seemed that the software was something of a crutch.  Without the software, the teacher felt that they had little to no control in the goings on in their class.  I tell them, although it’s nice to have, they don’t necessarily need it to use their Chromebooks.


As I said, some feel that without their management software in their class, they can't use technology.  They tell me that they can't trust their students to get their work done.  "There are too many distractions with the Chromebook" they tell me.  Ultimately, it comes down to how they dealt with distractions before tech entered their class.  I ask teachers, "how did you keep distractions to a minimum and therefore keep your students on task before students received the iPads?"  Apply those same principles you used teaching without tech and managing student use of iPads or Chromebooks in your class will be easy.

You don't need Chromebook management software.  If you do the following four things, management software in your class will be unnecessary.

1. Make engagement a priority. From the moment students enter your class, engage them in the days lesson, and don't let go!  Start your class with warm-up review of the previous days lesson using Kahoot or Socrative.  They key is, keep them engaged throughout the day and they won't have time to be distracted.

2. Make students want to do the assignment. Students need to know why they're doing the assignment.  Tell them how it's relevant to their lives or how the lesson will lead to what they will do later in the class.  Sell the assignment to them in a way that makes it beyond interesting!

3. Walk the Room.  You probably did this prior to those iPads or Chromebooks coming into your room.  It's really no different.  While your students are working, make sure you're actively walking around and checking to see what their doing.  Complement them or make suggestions about their work.  Don't sit behind your desk!

4. Make the screens visible.  My desks were in the old fashion rows.  But, when I got those Chromebooks, I made sure to move my desks up a couple of feet so as to make a pathway where I could walk or stand behind the class.  From the back of the room, I could easily see their screens.  And, if I couldn't, I would walk behind the row to make sure they were on task.

Saturday, February 9, 2019

6 Apps for Digital Exit Tickets


It’s the end of the class.  You’ve just finished another one of your amazing lessons and now you’re sure your students are full of newly acquired knowledge.  But how do you know?  I mean, are you sure your students have learned everything you want them to?  There’s one way to find out, an exit ticket!  Since they’ve got they’re devices still on, you might as well put their minds and your teaching to the test and put the last few minutes of class to good use.

There are some good apps out there that can help you with exit tickets:

Socrative:  With Socrative, you could simply type up a “quick question” and ask your students to answer it.  Or, use one of the cool features about Socrative, the exit ticket feature.  The built-in exit ticket asks how well students understood the days material and what they learned in class that day.  The last question is reserved to be open-ended, asking students to answer the teacher's question.  This gives the teacher a great deal of flexibility as they can come up with a question on the fly.  The question can be asked orally or displayed in front of the class.

Padlet: Padlet lends itself to an end of class exit ticket because of its ease of use.  It helps to have a Padlet wall always ready to go at a moments notice.  Give your wall a generic name such as “what did you learn today” or “answer the teacher's question,” that way, it can be used any time.  Display the wall so students can see what other students have written so they can learn from them as well.

Twitter: If you already use Twitter in your class, this one is easy to do.  Simply ask your class a question with a specific hashtag.  Then, have students respond using the given hashtag.  What makes using Twitter convenient is the availability on smartphones and that most students are aready familiar with it.  Ask your students to take out their phones and respond to the question using the hashtag.

Google Forms: In much the same way you might want to have a Padlet always at the ready, you could have a generic Google Form ready to go.  If you use Chromebooks in your class, this is a no brainer.  Again, create a shor answer question that asks your students what they learned today or asks them to answer your question.

Flipgrid: Perhaps students would enjoy recounting what they’ve learned in a simple Flipgrid video.  Using an iOS device or Chromebook, ask your student to recount what they’ve learned that day. Or, if you want to see if your students have learned the particulars about a specific topic, give them a specific question to answer.

Google Classroom:  If you use Google Classroom, this would be particularly easy to do.  Create a quesion in the classwork section of Google Classroom, allowing students to answer it right in your Google Classroom page.

Friday, February 8, 2019

Free the Cell Phone! Why Teachers Should Allow it in Class.

One of the hot button issues among teachers is the student use of cell phones in the classroom.  Some teachers find the very sight of a student holding a cell phone in the classroom an act of reprehensible behavior.  I say, embrace the cell phone!  Don’t ban the one device that students are most comfortable using!  

What follows is in followed by exclamation points because I’m standing on my imaginary soapbox:

Free the cell phone and put it to good use in your classroom! Turn it from a device of evil to one that engages and increases participation in your classroom!  Since student phones are generally always on, you’ll find that you can get your class started in a snap when you ask your students to take out their phones for use with a particular exercise!  Don’t shun the phone, embrace it! As with adults, students are apt to be more productive using a tool that they're familiar with and enjoy using!

Use the following apps to engage students using their phones!  

Socrative:  A fantastic formative assessment app!  Socrative has an app specifically for teachers as well as students.  Wnat to quickly get started?  Simply ask your students to take out their cell phones and fire up the Socrative student app.  They can participate in a space race game or take a quiz, all from their phone!

Kahoot:  Kahoot has an app tailored for a smart device.  Give your students the code and their off and running! Start your class simply by asking your students to open the app and enter the code.  You can do a review of the previous days learning or assess what your students have learned at the end of the period.  

Google Keep:  The Google Keep app is a great way for students to take notes.  Todays student are pretty adept at typing away on their smat phones, so why not let them jot down some notes using the Keep app?  If you want to make sure their taking notes and not texting their significant other, ask your students to share the notes with you by adding a collaborator or sending the notes to Google Docs and sharing them to Google Classroom.

Adobe Spark:  Adobe Spark has a suite of apps that include, Video, Post, and Page.  All three are only available on iOS with Post available on Android.  Video allows students to shoot and edit video, Post allows for graphic design work while Page allows for the creation of a web page.  

Google Classroom:  If your a Google Classroom school, allowing students to use their phones to access their Google Classroom is a must.  After all, as teachers, we want to promote that students are actively engaged in their class, during the school day and after the school day.  What better way to do this than to ask student to install the Google Classroom app on their phone.  Having the app will encourage them to stay up to date on their classroom activities such as pending due dates for assignments and class discussions in the stream.

What do you think?

Tuesday, February 5, 2019

Two Ways to Automate Your Teaching Life


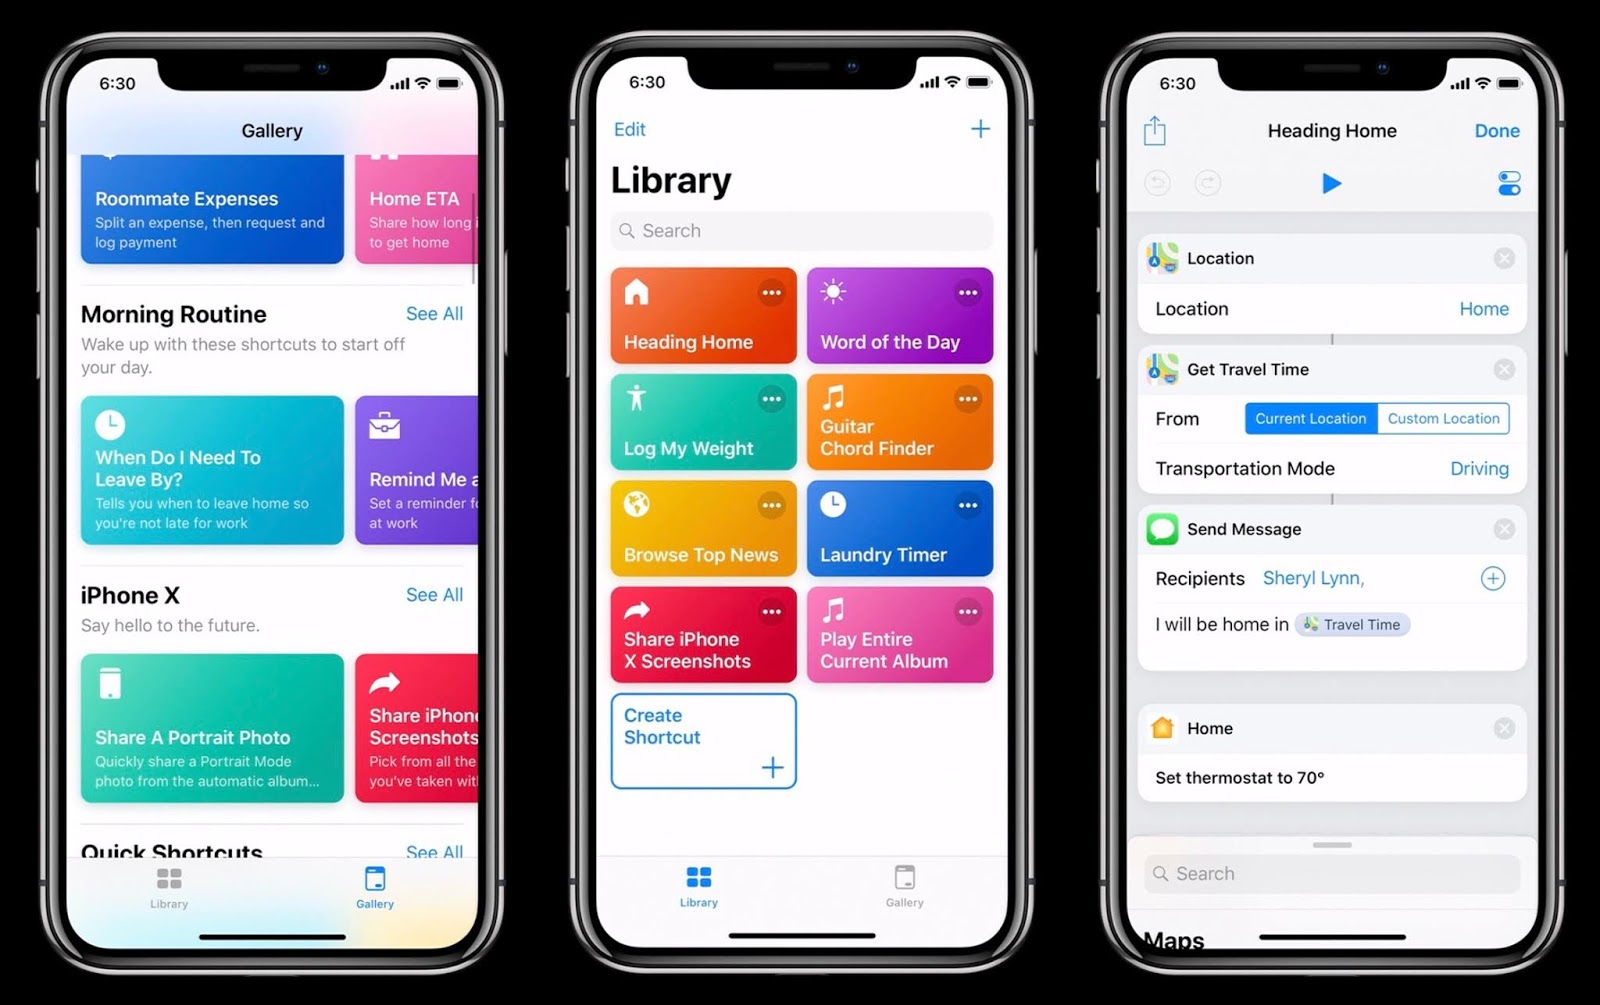
As a teacher, your time is precious. Time saved in your teaching tasks can be better used elsewhere in the classroom.  There are two apps that can save you time while helping you get stuff done.  For iOS and Android, there's IFTTT (If This Then That) and Shortcuts, an iOS exclusive.  They both essentially automate tasks, combining different functions, therefore saving you time and helping you get more done.


IFTTT is reactive in that if you initiate a task, then it will initiate another.  For example, if a new photo is taken on Instagram, the image will also be tweeted to the users Twitter account, therefore saving you the step of opening Twitter and tweeting the picture.  If you have a file you want to sync to Dropbox, IFTTT gives you the ability to also save those files to Google Drive, therefore automating the tasks.  If you want to make sure and not miss an email attachment, you can configure IFTTT to save your email attachments to your Drive or Dropbox.  There are countless ways to use IFTTT in your teaching life.  Simply open up the app and explore the countless ways you can find it useful in getting things done all the while saving you time.

The Shortcuts app is only available on iOS.  It's kinda the same idea as IFTTT in that it can automate your workflow (which is what Shortcuts was previously called).  But with Shortcuts, you create an action by adding different apps together to automate a task and get it done quickly.  For example, I created a shortcut where I can enter text, which creates a PDF, and asks me where I want to save the PDF, either to iCloud Drive, Dropbox, or Google's Drive.  As a teacher, I find this handy if you'd like to create a quick PDF and share it with your students through Google Classroom or any other LMS.  Like IFTTT, the Shortcuts app has a gallery from which you can choose already make workflows.

You owe it to yourself to check these out.  But don't get overwhelmed by the number of tasks that they offer.  Start out finding one or two things you do often that you'd like to automate, especially with Shortcuts.  Then, venture further and create your own Shortcuts.